Landing Pad Detection
What this is
The drone has to drop a package on a landing pad. Indoors there is no GPS, so it cannot just fly to a coordinate — it has to see the pad with a camera and fly towards what it sees.
This section is about the software that does the seeing. We trained a small AI model to answer one question, once per camera picture:
Is there a landing pad in this picture, and where?
The answer is a rectangle drawn around the pad — reported as a position in the picture, like "the centre of the pad is at 0.63, 0.13".
Turning that into "the pad is 1.2 m to the right", which is what the flight software needs, is a separate step that requires the drone's height. That step is written but has not run yet; see Talking to the flight software.
That is the whole job. The remainder of this section documents how that answer was made reliable.
How the drone uses it
The camera is mounted pointing straight down. The drone takes off, climbs to about 2 metres, and then flies a search pattern — back and forth across the hall, widening as it goes — with the camera watching the floor beneath it the whole time.
When the pad appears in the picture, the drone stops searching, nudges itself until the pad is centred underneath, and only then acts: it releases the package, and lands.
Three values from the flight software determine the requirements on the detector:
| Search height | 2 m |
| Highest it may go indoors | 4 m (safety limit) |
| "Centred" means | pad within 15 cm of directly below |
Terminology
Terms such as recall, quantisation and false positive are defined in the Glossary.
The pad
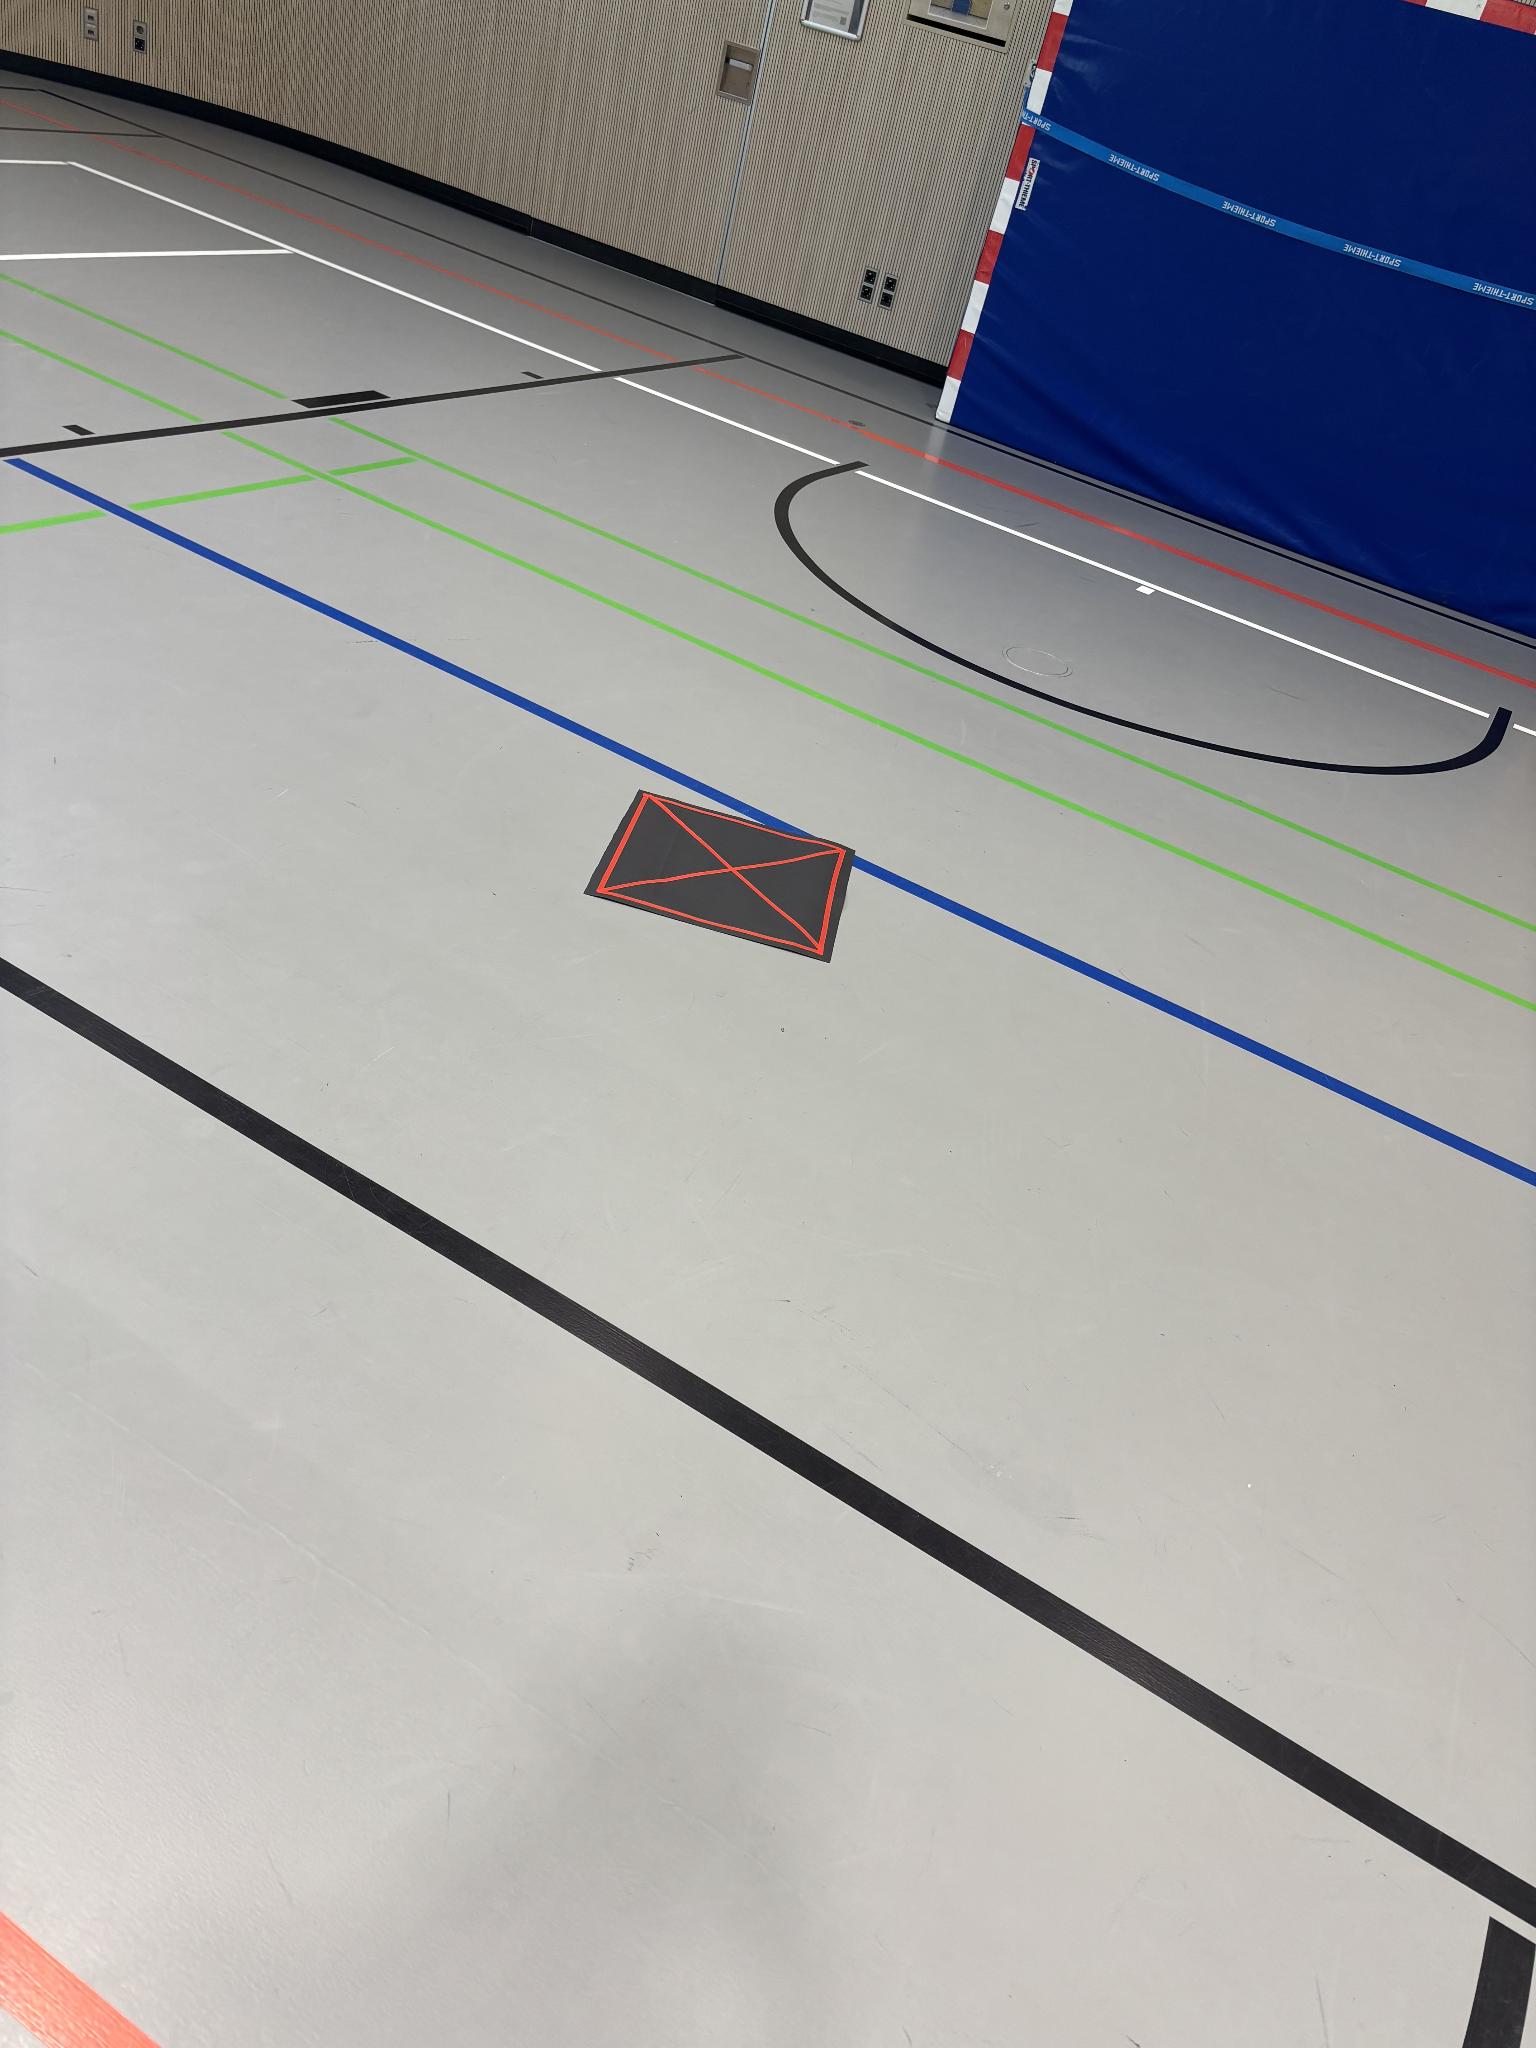
A dark mat with red tape: a border and a cross from corner to corner.
We did not design it — we copied it. A free dataset on the internet already had 77 labelled photos of a pad with exactly this pattern. By building ours to look the same, we could use those photos for training instead of taking and labelling hundreds of our own. Details: Dataset.
One thing follows from the shape and comes up again later: turn it 90° and it looks identical. That is convenient for recognising it, but it means the camera can never tell which way round the pad is lying. For landing on a square pad that does not matter.
How it works, in four steps
- Collect pictures. 123 photos of the pad — some ours from the sports hall, most from the free dataset. Every pad is marked by hand so the model knows what it is looking for.
- Train. The model looks at the pictures over and over until it can find the pad by itself. This takes about 13 minutes on a laptop.
- Convert. The trained model is a laptop file. It has to be repackaged into the format the camera chip understands.
- Run it on the drone. The Raspberry Pi AI Camera has a small AI processor inside the camera itself. The model runs there, not on the Raspberry Pi. That matters because the Pi is a slow computer and is already busy flying the drone.
Does it work?
Yes. Three numbers, and what each one means:
| Number | What it means |
|---|---|
| 16 of 16 | On our test photos — pictures the model had never seen — it found the pad every single time. |
| 2 in 100 | On photos with no pad in them, it wrongly claimed to see one about twice per hundred pictures. |
| runs live on the camera | Confirmed on the real drone: the model detects the pad in real time and follows it smoothly as it moves. |
The third one is the important one. Everything before it was measured on a laptop; this one is the actual hardware doing the actual job.
What it cannot do yet
-
It has never seen the pad from straight above. Every training photo was taken by hand from standing height, at an angle, with the pad filling most of the frame. Seen from an angle a square pad looks like a slanted trapezoid, and that is the only shape the model has ever been shown. Looking straight down it is a square. This is the real untested gap, and a bigger one than distance (see the box below).
-
It has never seen the pad while moving. Every training photo is a still shot of a stationary pad. The drone searches continuously.
- The autonomous flights have not happened. Detection itself now runs on the real aircraft, but nobody has yet flown the full search-detect-drop sequence under the real camera.
- Indoors only. Grass, asphalt, sunlight — all untested.
- Only this one pad. Because we built our pad to match the training data, we cannot say whether the model would recognise a different landing pad. It might just have learned "this exact strip of red tape".
Distance is less of a constraint than the measurements suggest
Several pages here measure how the model copes as the pad shrinks in the picture, and it does get noticeably worse once the pad becomes small. That is worth putting in the context of this drone.
At the 2 m search height, a pad about a metre across fills roughly 38 % of the picture width. The training photos have it much larger — 78 % on average — but the model was measured at both sizes and finds the pad every time at either.
The point where it starts to struggle corresponds to flying at about 7 m, and where it drops off badly to about 10 m — both far above the 4 m indoor limit, let alone the ceiling.
So the weakness is real, and this drone cannot climb high enough to meet it. What it will meet is the viewing angle, which is a different problem.
Status (2026-09-22)
network.rpk is on the Pi and detection runs on the real aircraft. What has not
happened is the autonomous bring-up: nobody has yet flown the search, detect and
drop sequence with the real camera in the loop.
All measurements reported in this section were obtained from photographs, not from flight data.
The one thing worth doing next
Film the pad from the drone while it flies its search pattern, and train on those pictures.
Every other improvement is small next to this one, but the reason is not what it first looks like. It is not that the drone is further away: at 2 m the pad is nearly the size the model already knows. It is that the drone looks straight down while moving, and every training photo was taken at an angle while standing still.
A few hundred frames from an actual search flight would fix both at once, and would be worth more than any amount of further tuning. The drone already records video.
Where to read what
The pages are ordered to be read in sequence. Each begins with a summary of its contents.
-
Which pictures we used, where they came from, and why we had to reorganise them before training.
-
Six attempts at teaching the model. What helped, what did nothing, and the mistake that mattered most.
-
How we tested it, and why the standard test score was useless here.
-
Getting the model onto the camera chip, and the traps along the way.
-
How the detector talks to the flight code, and what is still to fix.
-
Definitions of the technical terms used in this section.